
1. By using a pre manufactured saddle
|
Advantages Quick Strong and adds to hull stiffness Often have strap fixing
points |
Disadvantages Heavy Expensive You'll need to buy some foam
anyway Not
adjustable |
2. By using lots of closed cell foam:
The method I use
The method I use
|
Advantages Lightweight Can be fully custom fitted 1/2 the price of a saddle You'll need foam anyway! |
Disadvantages Lots of work No strap points Need lots of
glue! |
I use foam as I can adjust everything to the
way I like it and playing around making things is
something I enjoy. If you don't have a lot of time
or are impatient then I'd buy a pre-manufactured
saddle.
I use foam as I can adjust everything to the way I like it and playing around making things is something I enjoy. If you don't have a lot of time or are impatient then I'd buy a pre-manufactured saddle.
Straps
Probably the most talked about topic other than rolling!
I only have one rule for straps THEY MUST BE QUICK RELEASEbecause no matter how good you may think you are there may come a point where you or someone else has to get you out of your boat quickly and if your straps are fiddly the chances are you wont be able to undo them in a stressful situation and someone else may not have the first clue how to use them!
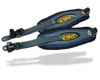
Anyway, I use a set of the old riot thigh braces as they come with all the ratchets you will ever need and the wide padded straps mean that they are very comfortable.
Other straps that can be used are:
Snow board bindings, cheap but riot straps are �36 a pair and worth the extra in my opinion
Plain old 50mm webbing
Quick release buckles include:
Plastic harness buckles from Life vests
Steel buckles from a diving belt (about a fiver from any dive shop)
Airplane seatbelt buckles (bought on a belt from some clothes stores)
Outfitting Using Closed Cell Foam
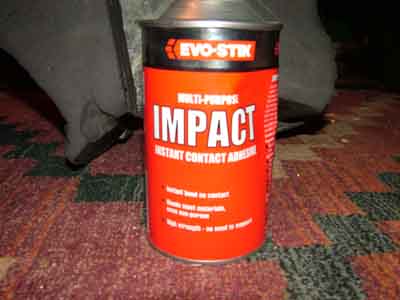
Ok, this is my step by step guide to creating a C1 conversion from a Kayak. I have used a Liquid Logic Space Cadet, foam which was bought from the Peak Shop at �15 a block, Evo Stick contact adhesive which is about �7 a tin from focus etc, Straps from peak as discussed on the previous page and a bread knife.
1. The first thing to do is strip out ALL the outfitting so you just have an empty shell. This includes the stringer (the bit of plastic that runs down the hull base) and the bulkheads (the foam in the ends)
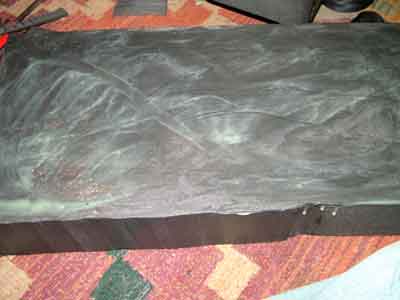
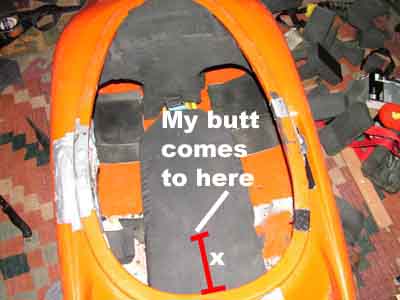
2. Start on the saddle. There are two methods to this, one uses two blocks of foam glued side by side with their large faces glued as below but i don't use this method so don't start! this is for information only!!!!
Once glued a section is cut out of both blocks to form the saddle and backrest tailored to the paddlers needs, as indicated by the red tape in the photo below: (the top right area is removed)
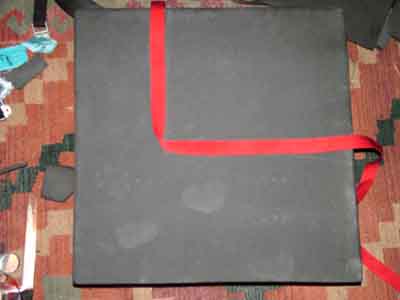
The second method is the one I use and it uses 1/2 a block of foam less than this and is outlined below:
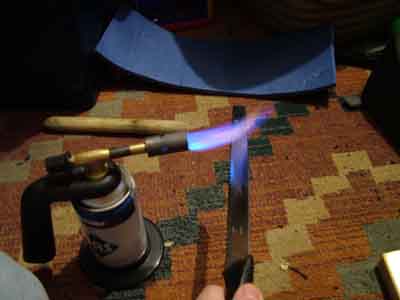
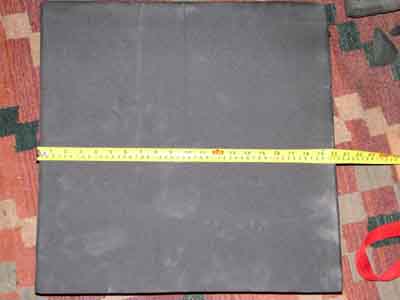
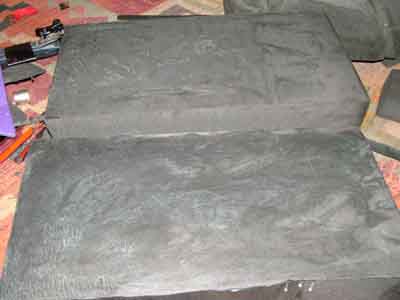
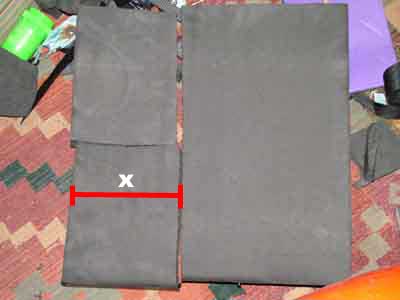
3. Start by measuring up and cutting one of the blocks of foam exactly in half lengthways as shown by this series of photos:
When cutting foam I always use a hot knife as this slides through the foam and seals the edge as it cuts. However it is very easy to burn yourself and to cut the foam wrong as it cuts fast!!
4. Once you have the two halves lined up on top of each other as above, make sure you are happy with them then crack open the evo stick!
5. The way to use this is to run lines of the glue all over one side of one of the blocks and then smooth it all over the surface with a scrap of foam or something similar:
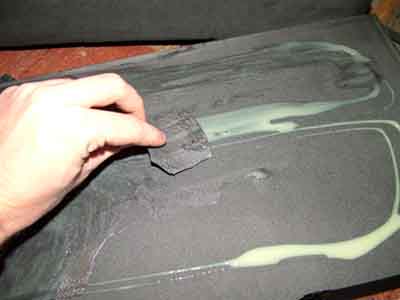
6. This gives one surface of the foam complete coverage with the glue
7. Place this block onto the other and rub it around a bit so some of the glue covers the other block
8. Leave this to dry for about 5-15 min's, depending on the conditions, until it feels pretty dry and sticky.
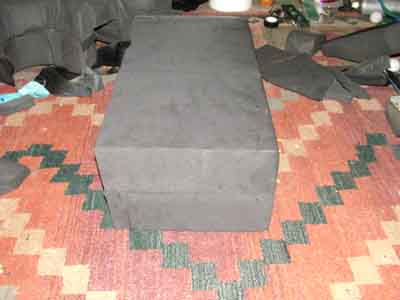
9. Now line up one edge of the blocks and stick them together. You want to get this right first time as if the glue has dried properly its going to stick and hold pretty much until you hack it apart with a knife!!!!
This now gives you the base for your saddle.
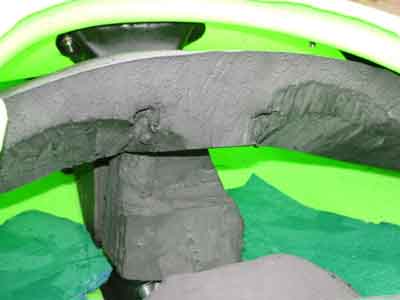
10. While the saddle is gluing, take your stringer and put it in your boat, mark where you want the front of the saddle to go (generally this way of making the saddle means the back can be pushed right up against the rear bulkhead if that makes sense!!!)
11. Choose which side of the saddle base you want to have as the bottom, then place it on a flat floor with this side up. Place the stringer on top, exactly where you expect it to sit when it is in the boat. Again the easiest way if you get stuck is to place it back in the boat to get an idea Make marks down both sides of the stringer as we need to cut the saddle so it sits flat on the bottom of the boat:
12. You can now start to cut the bottom of the saddle to the shape of the stringer. You can just cut a rectangle wedge out but I prefer to have as much foam to stick down as possible! This stage really depends on your patience and boat so here are the photos of how I do it, but do as you see fit.
 Cutting for the raised ends
 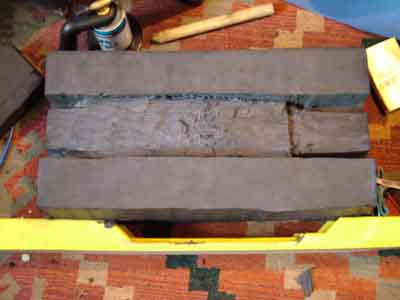 Cutting the depth
 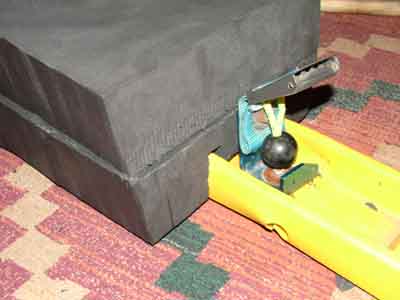 Making sure it is sitting flat (not quite right
yet!)
Making sure it is sitting flat (not quite right
yet!) 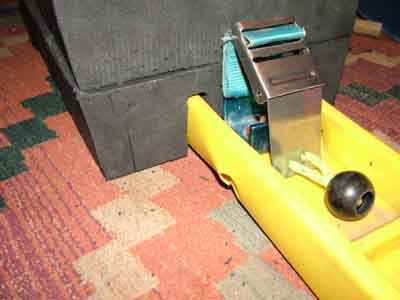 I am happy that this is sitting flat on the floor
when my weight is on it
I am happy that this is sitting flat on the floor
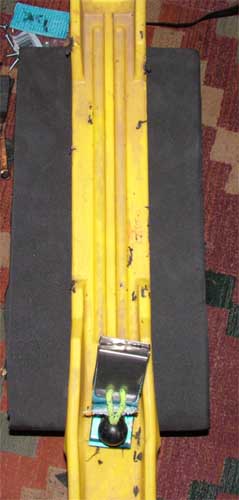
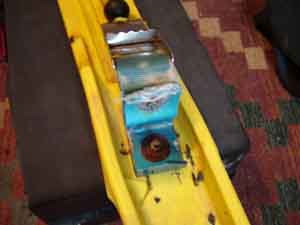
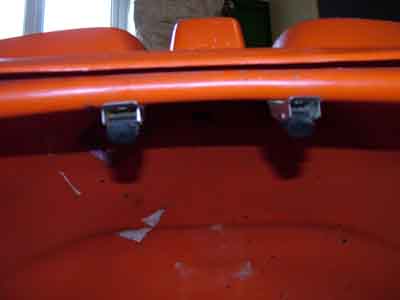
when my weight is on it 13. As you can see in the above pictures, I already have my quick release in place. It is held in place by an L shaped piece of metal which is bolted straight through the stringer with the bolt head on the underside and covered in foam so it doesn't damage the bottom of the boat. The quick release then has 50mm webbing threaded through it which is then bolted to the piece of metal. Finding a place to attach the quick release is the hardest part of the conversion. In a Kingpin you can bolt it to the hull using the forward stringer bolt, some people pass a piece of plastic piping through the whole length of the saddle and both bulkheads onto which they attach it. Its up to you where you attach it depending on what boat you have and what options you choose when outfitting your boat.
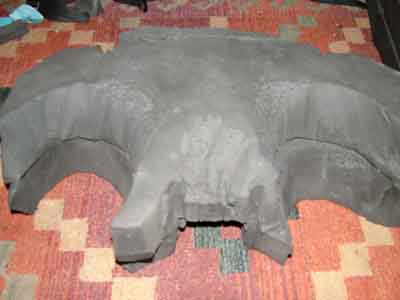
14. Making the Dashboard- We cover this stage next as it is easier to get the dashboard in before fitting the saddle. I have gone for a full on thick foam dashboard which used nearly 2 bits of foam (you can use this method but just use one piece of foam) which is a lot! However it is very very comfortable and holds my legs in place perfectly. There are other methods of holding your legs in place such as 1/2 a block of foam which is glued horizontally in the upper cockpit (its hard to explain but see below) or knee cups and I suggest you research all options before choosing!
Another option
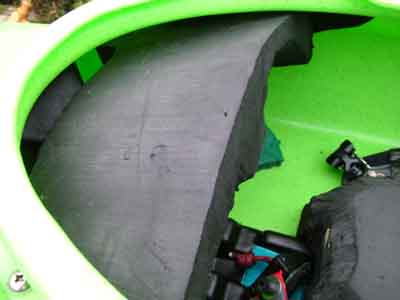
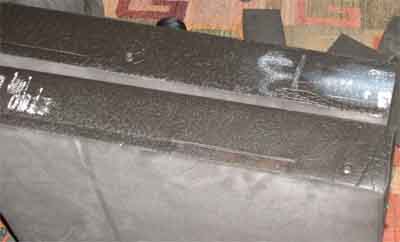
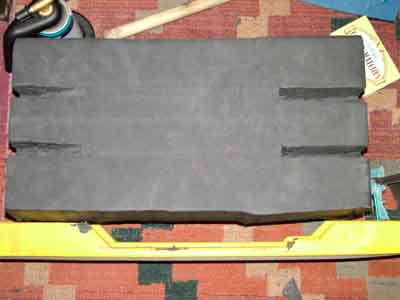
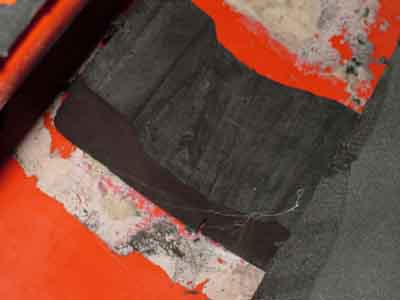
15. I had my dashboard from a previous conversion so I can't really do it stage by stage so I will explain alongside the photos! Basically it is two blocks of foam glued together by their large faces and then cut to shape to fit in the boat and then knee holes cut in. The only glue is fixing it to the bulkhead, its shape helps keep it very solidly in place!!!
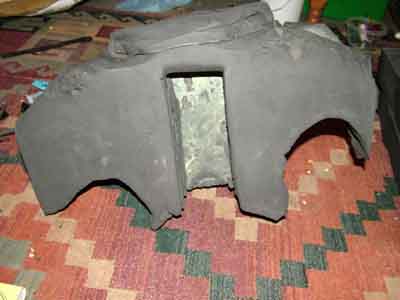
This is the end that faces forwards in the boat. Note the cut out for the bulkhead, this means it is held in place firmly with no extra glue other than fixing it to the bulkhead! also notice how the knee holes get smaller to the back so they fit the shape of my knees
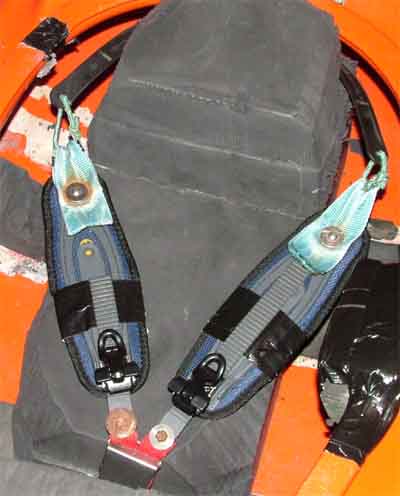
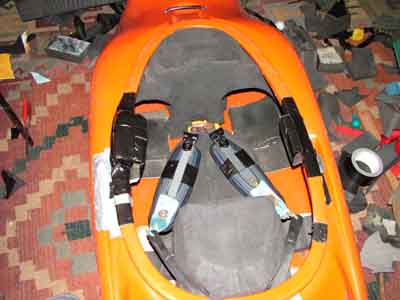
16. Now, choosing a place to fit the straps. A lot of people just bolt them into the old seat holes which is effective and easy. I drilled two holes in the back of the cockpit so that the straps come right from the back, I just felt that this secured me in my boat better. As I use Riot straps, I simply took the little one way ratchets off the back of the straps and bolted them in the back of the boat
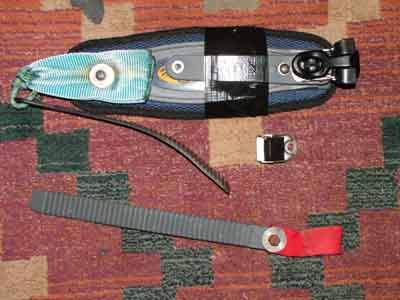
17. This is my straps set up. The back end of the straps have just a piece of 50mm webbing bolted on where the little ratchet used to be. This is doubles over and both ends are bolted down. A piece of cord is tied through the loop and through a ratchet strap. This end now fits into the ratchets I placed in the back of my boat. The other end just has the normal ratchet on. Now take another ratchet strap, and bolt to this a doubled over piece of 25mm webbing with the bolt head facing down as otherwise the nut will stick into your leg!!! I managed to find some really wide washers with small holes in which are great as they hold the webbing really well, but i haven't been able to find them since so if anyone does then let me know! The red 25mm webbing in the photo fits into the quick release alongside the other strap (not pictured). If you are just bolting the straps on: where the strap is tied to the webbing at the rear just pearce another hole in the webbing and bolt this on!.
When piercing holes: I heat up a braddle and use this as it melts through easily and seals the edges as it goes! (DONT BURN YOURSELF!)
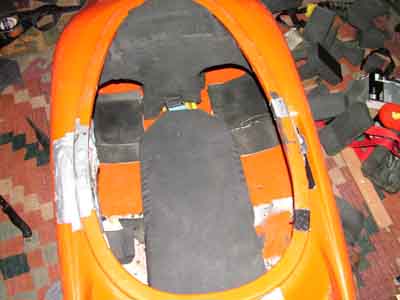
18. Ok so once your straps are sorted its time to put the boat back together!!! Put the bulkheads and stringer back into place then if needed fit the dashboard. Take your saddle and cover the bottom in glue, stick it in then take it out and let it dry as when sticking foam together. Once it is stuck in solidly you can start cutting it to the shape you want, I tend to smooth the edges and round the front. I also cut a section out of the front so I can access the Quick release easily!! You will note I have also glued in some roll-mat foam where my knees go.
19. Once the saddle base is set, drop it in your boat about where it will go and then kneel in. Mark the point where your lower back is as this will be the front point for the backrest. Measure the distance from the back of the saddle base to this point, then cut this width from another block of foam (lengthways) then chop this piece in half: (The measured width here is left to right)
20. Glue these two bits together the same way as the saddle base.
21. Once the saddle shape is to your satisfaction glue the backrest into place cutting it around the cockpit as needed and then cut it to a shape that is comfortable
22. Replace any bolts needed to fill gaps, (because I only Paddle C1 and don't intend to sell my boat, all the holes in it have been filled with plastic.) and cover any that protrude into the boat with a little block of foam.
Just two parts left now! Hip pads (mine are already in above!) and ankle blocks.
23. The hip pads can be done any way, I cut a U shaped piece of foam which then tapes in over the cockpit rim but you can just tape in any old foam as you see fit.

24. The ankle blocks are important as they keep your foot from pressing flat on the bottom of the boat which can be very uncomfortable. I just use a wedge shaped piece of foam (which has a u shape to it to hold my foot in place) with the fat end pointing backwards. When I am in the boat, the point at which my leg becomes my foot sits on the fat end of the wedge. Again i would just experiment until you are comfortable in your boat.
Ok and that's it! Play around with everything until it feels right for you and if you have any questions please email me! and I will try and get back to you